

Senior Capstone Project - Randy the Raccoon Face Rig
By: Mabel Perez

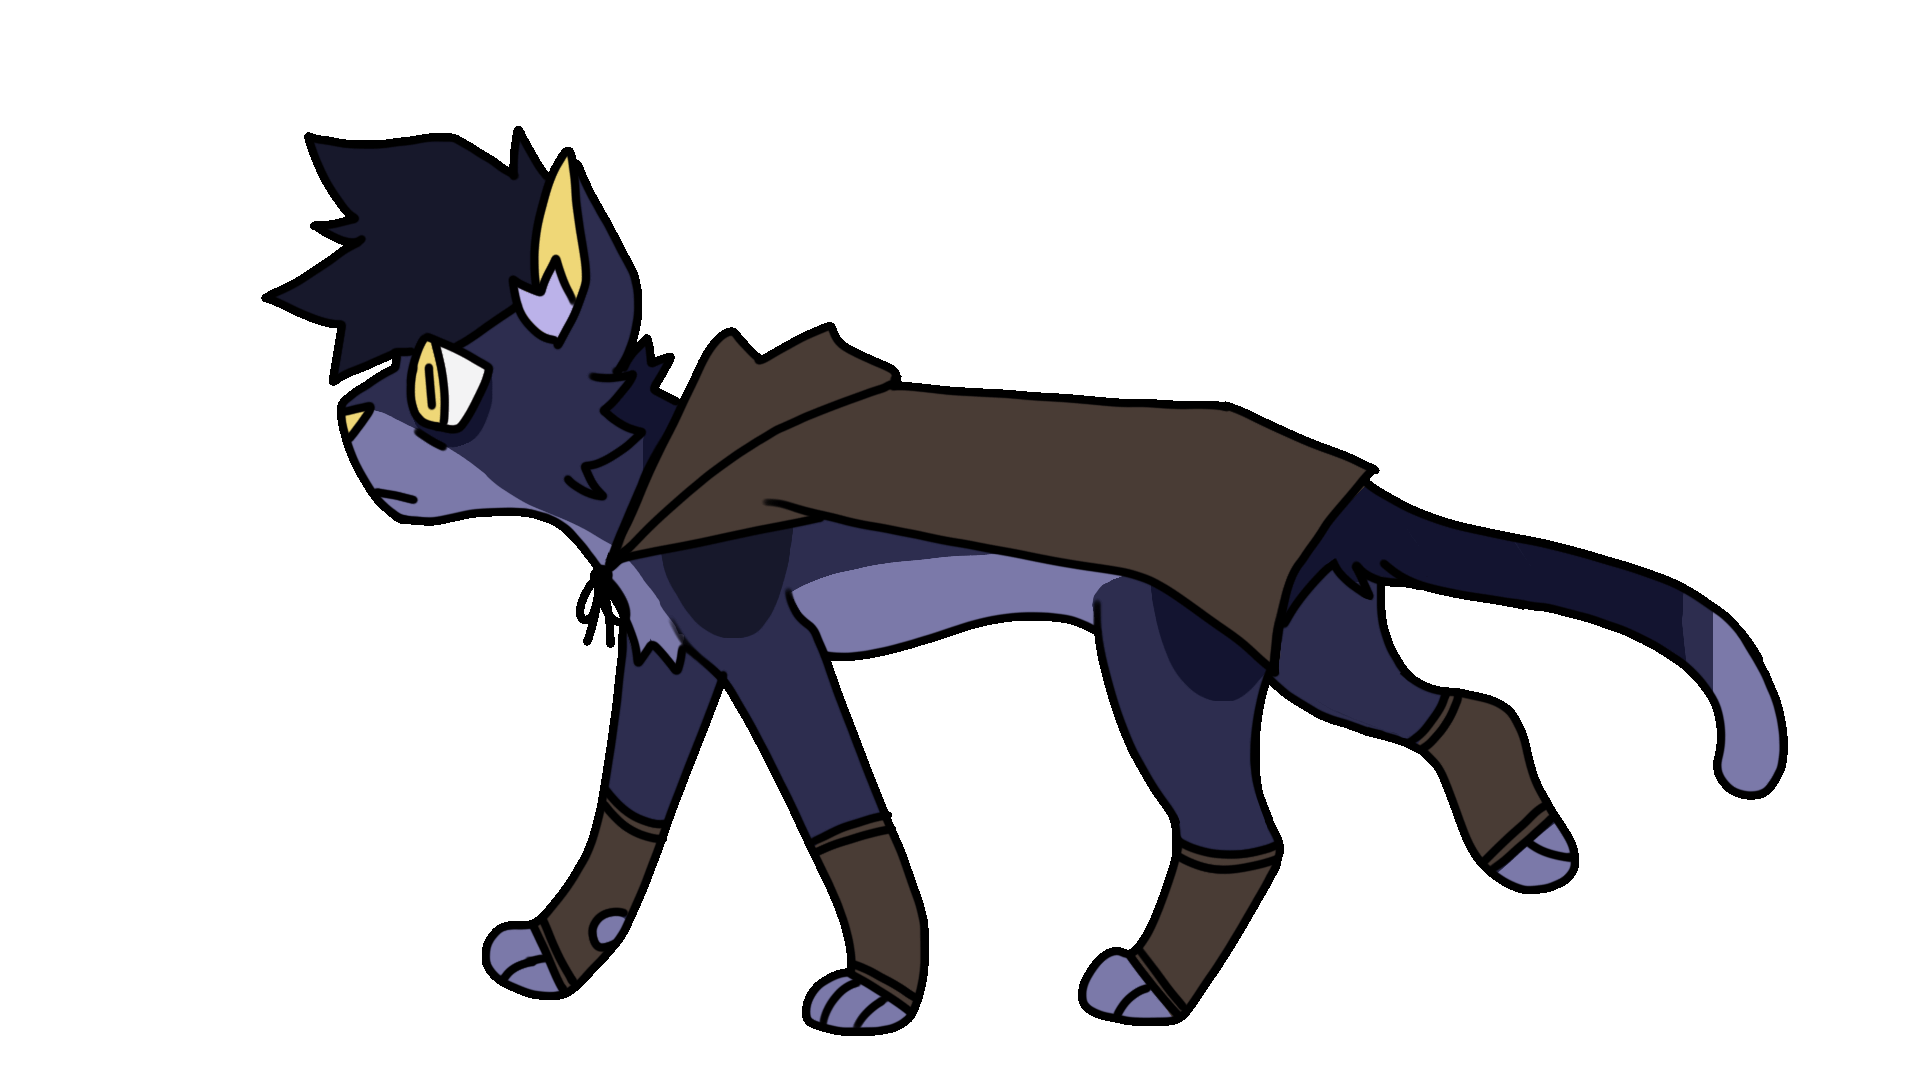
For my capstone project, I will be creating a stylized Character Face Rig based off the style of Dreamwork's movie, The Bag Guys. With this project, I wanted to take all of my knowledge I've learned during my time at Texas A&M University and apply it in a finish character face rig. I also worked on this project with the intention on getting better at character rigging, especially with the face since before I would use methods that lacked in expressions manipulation.
W


Week 1

During this week we made out pitch presentation to present and scope down where need be. I initially wanted to do a full body calisthenics test as my final deliverable but realized that it would have been a lot of work, increasing my chances of not getting it finished in time.
During this initial stage I had also started a proxy model with primitive geometry to get a base going of my character from the initial concept art I had made during the winter break before.


Week 2
During Week 2, I scoped down my initial pitch into having a face rig instead, so I didn't need to worry about the rest of the body rig. During this stage I also added additional tuft geometry onto the proxy model and remeshed the primitives to smooth out the base shape. At this time is when I would also seek out a mentor.


Week 3
I would receive a response from Karla, who has previously worked on creature rigs using scripting and manual methods. Week 3 is where I started major changes on from the proxy model. When getting feedback from Anna I would find myself getting rid of the tufts I previously added from week 2, since they will be hidden by the clothing anyway.
Week 5
.png)

I made an expression sheet of the key poses I wanted Randy to hit. I also did a paint over of the model from week 4 as I received notes that the model from last week didn't resemble my previous concept art. I also played around with a toon, harsh highlights shader that Nomad Sculpt provided for how the look of the current fur tufts I had looked like so far.

Week 4


For week 4, I would shorten Randy's neck since originally it felt too elongated. I also did some quick base colors surfacing within Nomad Sculpt to see what the model would look like besides the clay color.

_PNG.png)

_PNG.png)


Week 6
During this week I was working on getting as prototype for the eye rig. Using curves and clusters I made a simple rig to showcase a flat eyeball on a 3-Dimensional character. I was also working on retopologizing the sculpt to create blend shapes in Maya for different expressions
I was wondering how I could get the similar look of the Bad Guys eyes without making it obvious that I'm using geometry to replicate the pupil? I initially though of 2D textures on the geometry but then realized that changing the geometry of the eye would cause it to warp.
Then I thought of pinning a plane mesh onto the eye and depending on where the animator wanted the pupil they could use the controls to manuver it.
Week 7


Milestone 1 would be this week. I was a little behind on rigging and I should be getting more rig tests. Caleb also wanted me to focus more on the rigging aspect since the model was near completion. The eyes and body color would be altered after this week since it resembled too much of Rocket Raccoon.
For the rigging aspect, my mentor, Karla Chaang Gonzalez, recommended I did the eyes and eyebrows using joints and the mouth with a ribbon.
Week 8


Randy would be completely retopologized for rigging for week 8! I had to make slight modifications to the face due to having poles with 6 sides and edge loops that weren't placed in spots for good deforming, especially on the cheek and eyebrows area.


Texture UV based eye rig (Method 1)
Milestone 1 would be this week. I was a little behind on rigging and I should be getting more rig tests. Caleb also wanted me to focus more on the rigging aspect since the model was near completion. The eyes and body color would be altered after this week since it resembled too much of Rocket Raccoon.
For the rigging aspect, my mentor, Karla Chaang Gonzalez, recommended I did the eyes and eyebrows using joints and the mouth with a ribbon.
Week 8 Rig Test
A small wiggle test of the current controls on the rig.
Ribbons Placement
To get more deformation going on within the lips and mouth I had a ribbon with nhairs along the edges of a nurbs plane. These nhairs would have children joints that would follow the movement of the hairs.
Week 10

I added textures to the rig using one of the concept drawings I had in my initial concept art. I worked on getting base weights done during this stage and made a stretchy neck/spine with IK arms and shoulders since I was only going to be animating the face for the calisthenics video.
I also started a quick animation to get a feel for the current controls I had but received feedback on adding more expressions like a typical character rig calisthenics has.
I did receive some notes on the character model, especially with the teeth since there appeared to be an overbite so I quickly fixed that for next week.
Week 11
I fixed the teeth since they were creating an overbite by inflating them a bit and flattening the faces where they meet when the mouth is clenched. I also worked on the eye rig using Karla's feedback and demos which allows me to scale rotate the pupils using an aim constraint while still making it appear like a textured, 2D eye. The emotions also increased from just one angry face to 3: shock, smug, and happy. Something that I did come across on is that my color management in Maya made the animation playblasts look overly saturated and darker than the weeks before.
Week 12
I fixed up the weight painting on the shoulders and lips, added corrective shapes for the smile crease which can be toggled on or off by the animator. I also updated the calisthenics animation by adding more poses, splines, and pause time in between each pose.
Week 14
For week 14, I added more weight influence on the cheek tufts as well as fixed some of the crease geometry to shrink wrap on the skin. Another note I received from last week's presentation is that the calisthenics animation felt too "floaty" and rushed so I made the in-between poses more static.
Week 15
This week would be when I finish the calisthenics video as well as render it out for Vizagogo. I spent more time on the animation, since fine tuning the rig and animating made me lose track of the little time I had left. I was able to email Karla one last time before my final adjustments for the rig. I added some corrective blend shapes to smooth out anything that may look off in the animation test. I also added more teeth props for different expressions (shark, normal, elongated) as well as teeth controls for the top and bottom to make them scalable.
Some things that I would change differently is definitely putting aside more time for the rig and animation, but I am very happy with the end result and can't wait to finish the rest of Randy's body rig!